Official Manual · Quick Setup
Shadowrocket Quick Setup
Add a server or import a subscription, choose a connection mode, and verify access.
Add Server: Add or import
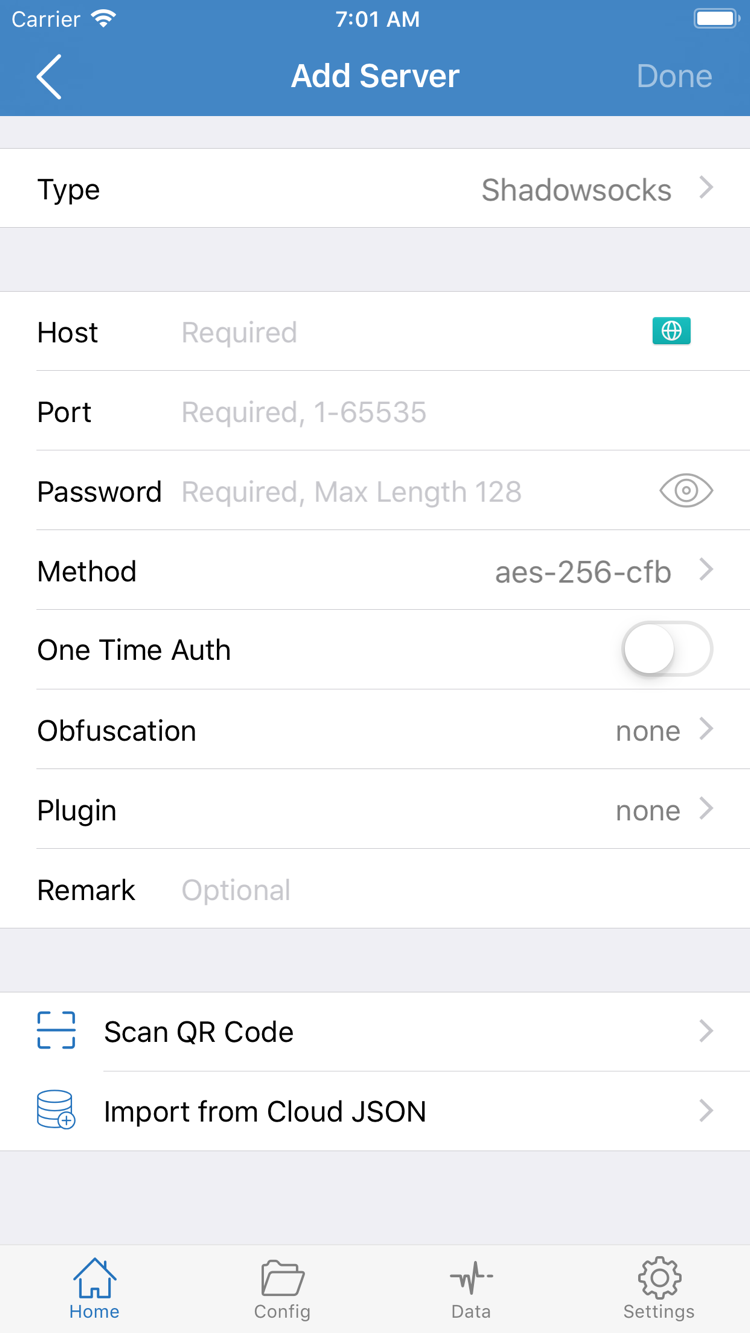
Start by identifying what information you have. A subscription link usually retrieves a set of server entries that can be updated. Details for a single server include its protocol, address, port, and authentication parameters. Choose one method for initial setup. Open Shadowrocket and go to Add Server from Home, or tap the add button in the top-right corner of Home.
Have a subscription link? Choose Subscribe
In Add Server, open Type and choose Subscribe, then paste your complete subscription link into the address field. If the link has query parameters, keep them when copying. Do not copy only the beginning of the URL or include the title or instructions from the page where you found it. After saving, return to Home and wait for the subscription to retrieve its entries, then check for selectable servers under SERVER. A subscription link may contain access credentials. Do not post it publicly or include it in a screenshot.
Have details for a single server? Enter them by protocol
First select the protocol specified in your details under Type, then enter Host and Port. Enter the provided domain name or IP address in Host, and enter the port separately in Port; do not combine them in one field. Password and Method shown in the screenshot are fields for the protocol shown; the form may differ when you change Type. Enter each value from the corresponding server details. If a parameter is unclear, check with the original service provider instead of filling it with a parameter from another protocol. If you have a QR code, you can use Scan QR Code; check the imported entry afterward as well.
After saving, return to Home and tap the server you want to test under SERVER. An entry in the list only means the details were saved or retrieved; it does not mean the server is connected. If no entries are available, first resolve the import failure rather than toggling the connection switch repeatedly.
Global Routing: Choose a mode
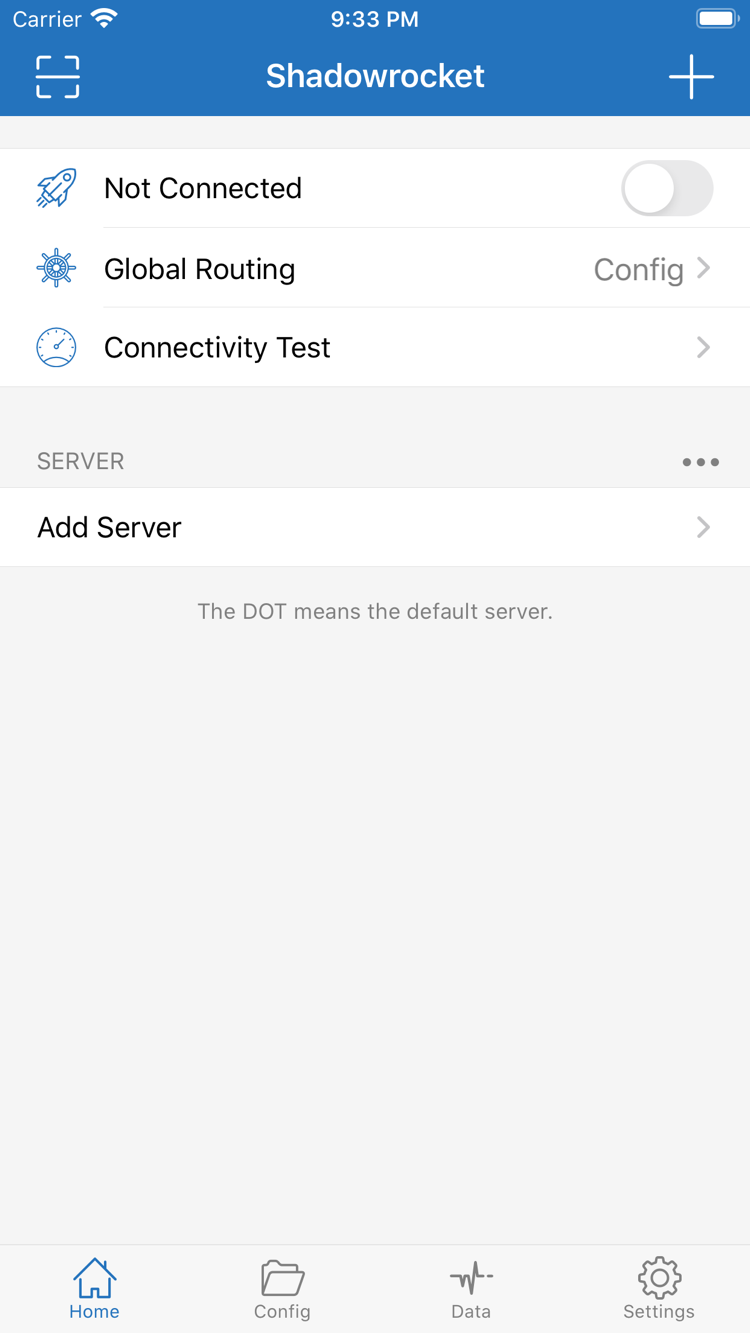
Tap Global Routing on Home. This setting determines how the client handles traffic after the connection is enabled; it does not select a server or modify subscription contents. Decide whether you are setting up everyday routing, checking a server, or comparing direct access, then choose one of the three modes below.
- Configuration (Config)
- Matches traffic against the rules in the currently enabled configuration file. Matching requests may use
PROXY, useDIRECT, or beREJECTed. Choose Config when you already have rules and want to handle different destinations separately. - Proxy
- Does not apply the configuration's routing rules one by one; instead, it uses the selected server for traffic handled by the client. During initial setup, choose Proxy temporarily if you only want to check whether the server is available, then switch back to your usual mode after verification.
- Direct
- Sends traffic handled by the client directly, without using the selected server. You can use it to record a comparison result for your current network. The connection switch being on does not change what Direct means, so its position alone cannot tell you whether a request went through the server.
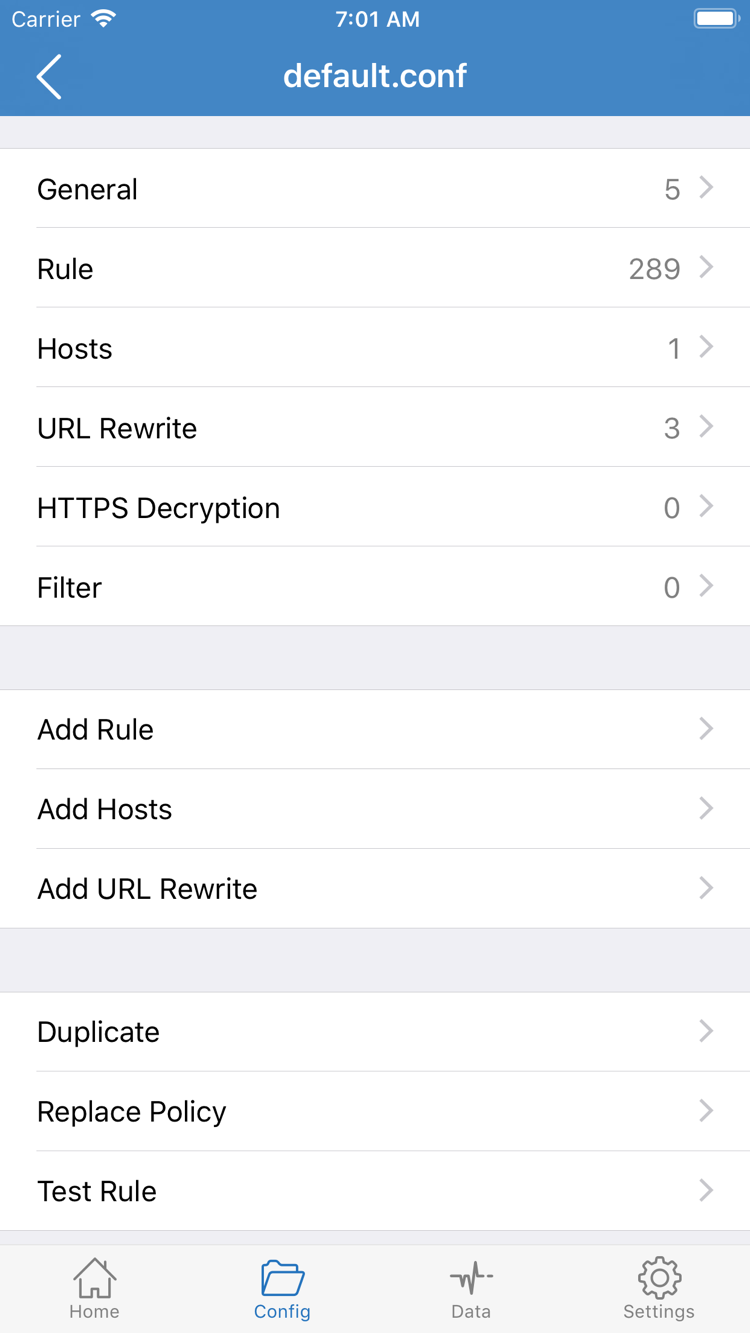
Config under Global Routing is a mode; Config at the bottom opens configuration files. If you choose Configuration (Config), open Config at the bottom and confirm that the intended file is enabled. Its editor shows sections such as General, Rule, and Hosts. For an initial check, you only need to verify the file; there is no need to tap Add Rule just to connect. See Configuration Reference for rule matching order and syntax.
After choosing a mode, return to Home and check the value shown on the Global Routing row. Note the mode and selected server, and keep both unchanged in the next step so you can identify what to check if the test fails.
Home: Turn on the connection
On Home, check two things one last time: the server selected under SERVER is the one you want to test, and Global Routing shows the mode you chose in the previous step. Then toggle the switch on the Not Connected row at the top. The first time you turn it on, iOS or iPadOS may ask to add a VPN configuration. Confirm the prompt appeared after your action in Shadowrocket, then allow it as directed by the system. If identity verification is requested, complete it in the system interface.
After granting permission, return to Home, wait for the status at the top to change, and make sure it does not immediately return to Not Connected. If the switch turns off again, first check whether system permission was granted and whether another VPN connection is in use on the device. If the device is managed by a school or organization, system policies may restrict adding a VPN configuration. Check with the administrator instead of repeatedly retrying or deleting an existing device configuration.
The status at the top indicates whether the client connection is on. It does not prove that the remote server is reachable or that every request follows the same route. For now, do not change On Demand or switch between Wi-Fi and cellular. Keep the current conditions and continue to the next step to check the client test and actual access separately.
Connectivity Test: Verify access
Run Connectivity Test on Home and record the result for the selected server. It reflects this test under the current network and test method. A successful test does not mean every destination is accessible; a single timeout does not prove the server is unavailable. Note whether the test succeeded, timed out, or displayed a message, then check actual access.
Choose a page you could normally access and reload it in a browser. Confirm that a new request was sent rather than relying on an already-open tab. Keep the same network, server, and destination during the check. To compare against direct access on your current network, switch Global Routing to Direct only, revisit the same destination, and record the result.
How to interpret the results: If a destination fails only with Configuration (Config) but loads with Proxy, first check the enabled file and the rule that matched. If it also fails with Direct, check the current network and the destination itself. A single page load cannot show which rule took effect; record the selected mode along with the test destination.
After comparing results, restore Global Routing to the mode you plan to use every day. If access works as expected, initial setup is complete. If there is still an issue, check the item in the next section that best matches the symptom; you do not need to start over and import everything again.
Settings: Common issues
No entries after import
First confirm that the basic network connection works, then check that the address in the relevant Subscribe entry is complete. Common copy-and-paste issues include missing trailing parameters or accidentally including instructions and spaces. If the app reports that the address is invalid, check with the original service provider for the current link and its validity period; do not replace your existing details with a link from another source. For manual setup, check Type first, then Host, Port, and the authentication fields. An entry can appear in the list even if a required value was entered incorrectly.
Test reports an error, but a page loads
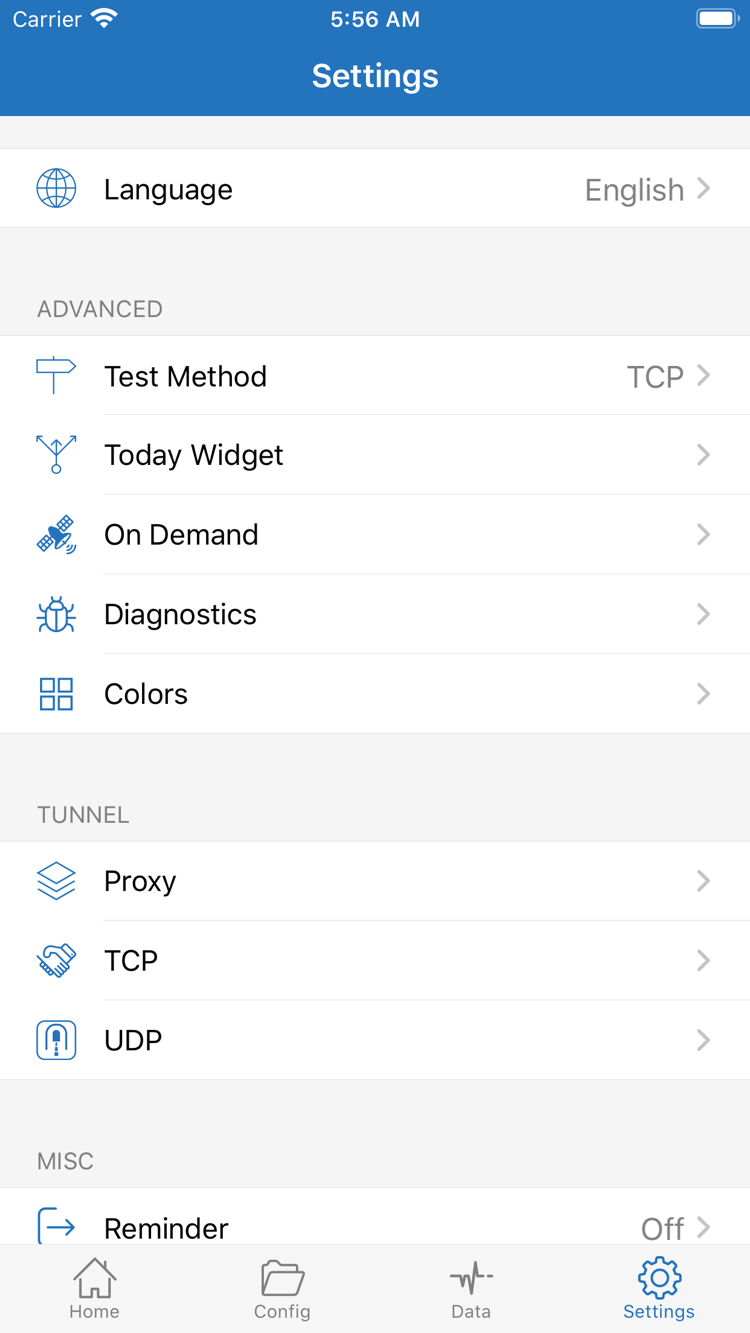
Open Settings and check Test Method. Note the current method, then return to Home and run Connectivity Test again. Results from different test methods should not be compared directly. To compare two tests, keep the network, selected server, and test method the same. Also check Global Routing at the time of the test. For example, a page that loads under Configuration (Config) may have matched DIRECT; that alone does not prove the server is forwarding traffic correctly.
Only certain destinations fail, or the connection turns on again after disconnecting
If only certain destinations fail, return to Config and check the enabled file and its Rule. Rules are usually matched from top to bottom. First check whether a broad condition matches earlier than expected, then check how FINAL handles requests that did not match. If the connection turns on again after you disconnect manually, check On Demand and its existing conditions in Settings. These symptoms have different places to investigate; do not rewrite rules and change connection conditions at the same time.
Change one item at a time, then return to the Connectivity Test steps and repeat the same check. To document an issue, note the failed step, network, Global Routing value, and any on-screen message. Before sharing a screenshot, hide subscription URLs, server authentication fields, and any other information that does not need to be public.